In this guide, I’ll show you how to display a “timeline” of events from ALL of your cameras that are utilizing the LLM Vision integration into a single card on your Home Assistant dashboards.
For reference, in my previous post (link in Step 1), I showed you how you can feed your doorbell and security camera images into the “Image Analyzer” tool of LLM Vision via Home Assistant integration.
This guide…takes things a step further.
Notifications are great! And I love them. But they can get lost in the sea of all your other notifications. And if on Android (not sure about IOS), but the images get lost in your Notification History. Additionally, if you have a spouse or family member who does not get these notifications (but has the HA companion app and they still want a quick overview of events) – this guide is for you.
That brings us to the LLM Vision Timeline card, which is fantastic and thought would be a great post to document pair with the initial guide.
Let’s get started!
Step 1: Set up LLM Vision integration via HACS
I won’t rehash the details in this post, but you can follow my How To Feed Camera Snapshots into AI via Home Assistant post.
Basically, I have an automation that stores the doorbell/security cam images into a folder, Google Gemini analyzes them, and then it sends a notification with the image + AI description of what it sees to you.
I’m using a Reolink Doorbell camera and a Reolink E1 Outdoor camera for this, but you should be able to achieve this with most makes and models.
Step 2: Download Timeline Card via HACS
Assuming you have the LLM Vision integration working with whatever AI provider you’ve chosen (I’m using the free tier of Google Gemini), and have your notifications already working, the next step is to download the LLM Vision Timeline Card.
The link above has instructions, but I’ll quickly go over the install steps here so you don’t have to bounce back and forth between sites.
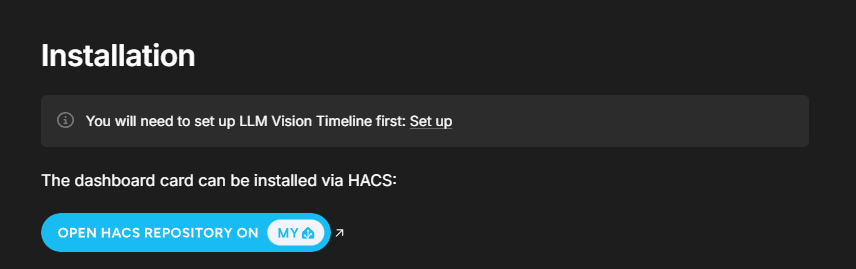
2.1: Download the Card
Click this link and then “Open HACS Repository”.
Then, reboot Home Assistant from Settings > System > Restart Home Assistant.
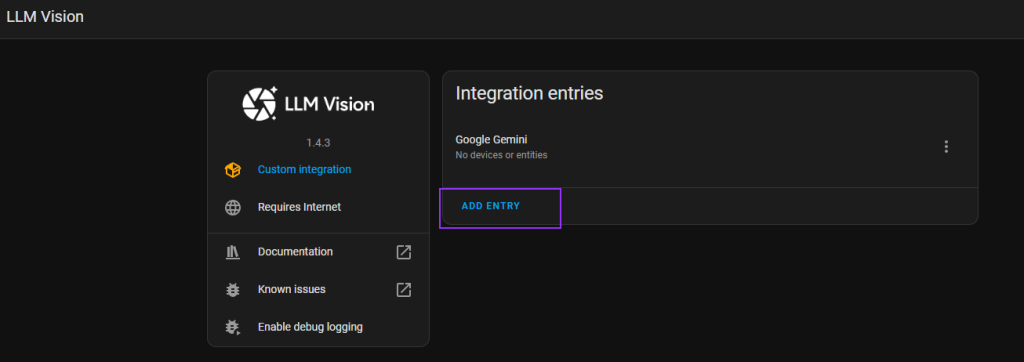
Step 3: Configure LLM Vision Integration to Use Timeline
Settings > Devices & Services > LLM Vision
Then, click Add Entry.
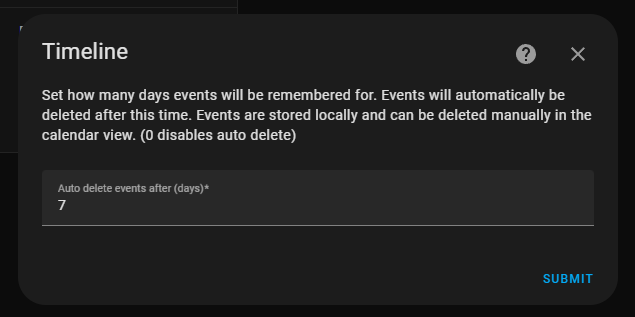
Choose “Timeline”
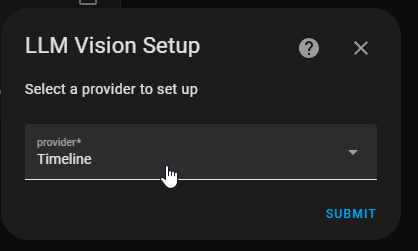
It’ll prompt for how long you want to keep the entries. 7 is the default, so I’m leaving it at that for my use case. (0 disables auto-deletion)
Step 3: Ensure Events Get Added to your Timeline
Now that we have things configured, we can create the Home Assistant card to be displayed on one of your dashboards.
Note: For any existing automations you already have set up, you may need to edit them.
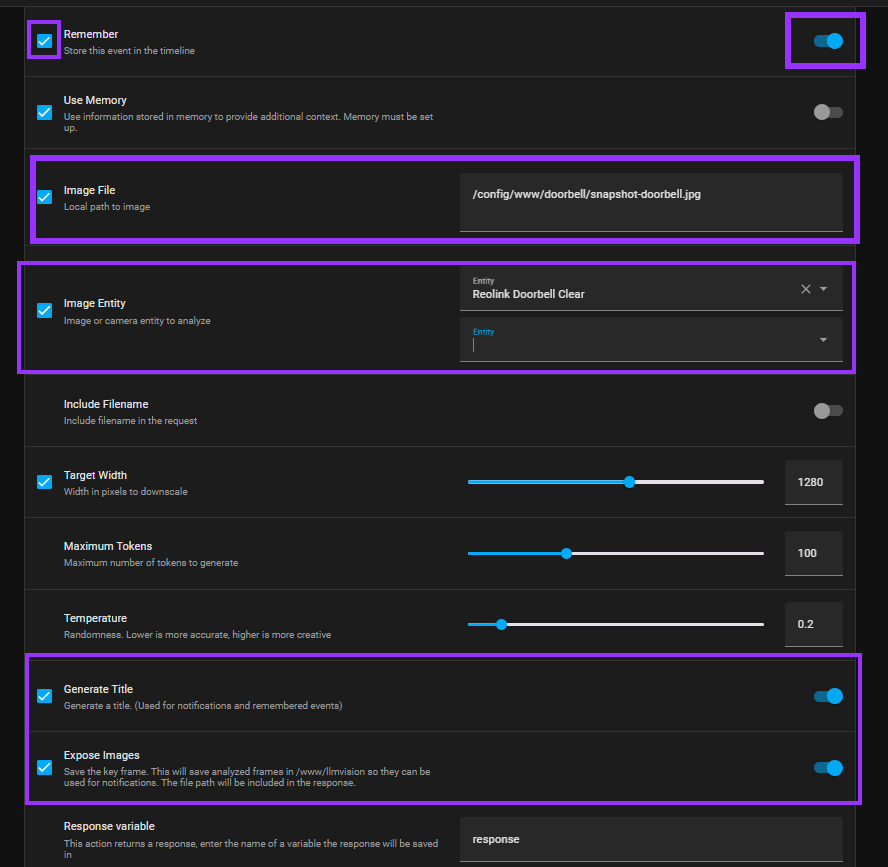
Even if the “Remember”, “Generate Title”, and “Expose Images” box is checked, you also need to set the toggle to On.
For the Image Entity, make sure you choose the correct entity in the respective automation. This is so you can view snapshots of those within the LLM Vision Card.
- (I.e. – In your Doorbell notification, choose the Doorbell entity
- (i.e – In the Driveway Cam entity, choose the driveway cam entity.
Step 4: Add the Card
The last step is to simply add the card to your Home Assistant dashboard. Add a new card like normal.
Add Card > search for “LLM Vision Timeline Card”.
Choose the LLM Vision Calendar entity, and make sure to check any cameras you want displayed in this card.
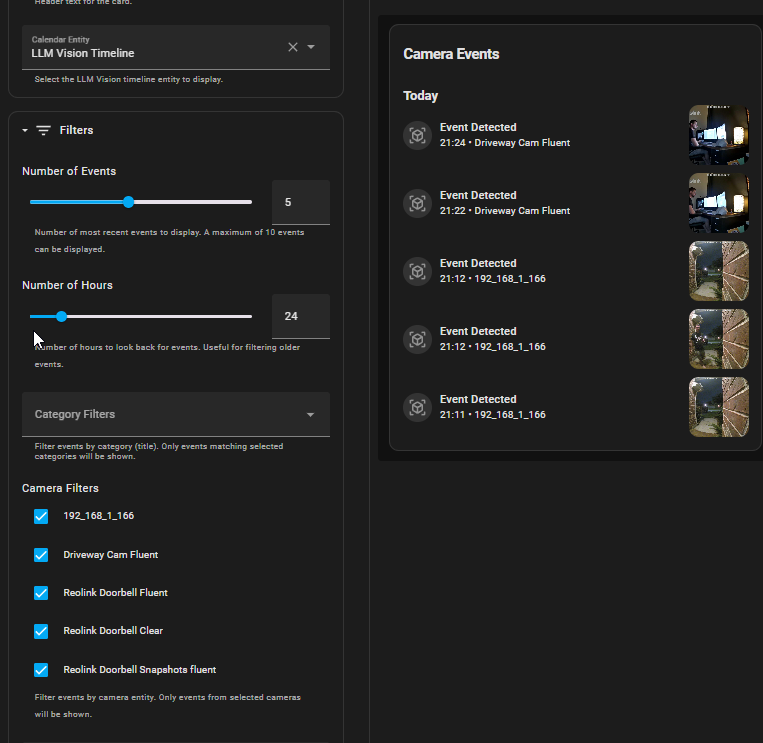
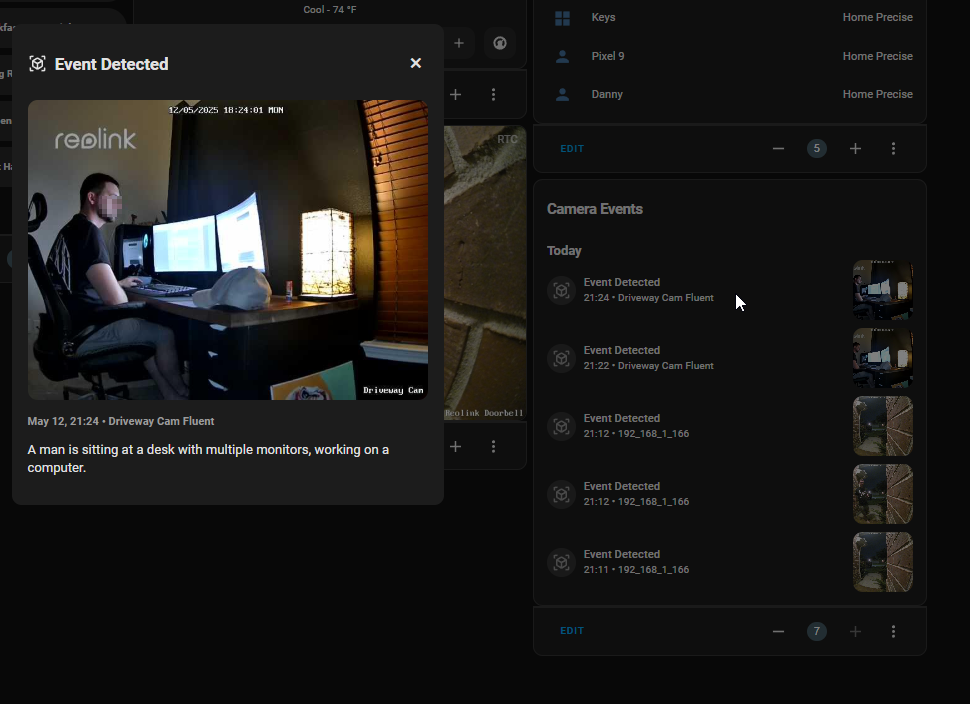
And finally, if you click on one of the entries within the card – it should show a screenshot plus AI-description of the event that triggered it, which is super cool to me.