In this guide, I’ll show you how to add the Aqara Door and Window sensors to Home Assistant in 2024.
While I have used these in the past and wasn’t super happy with them, I recently moved houses and thought I’ve give them another shot. This time around, I have a very strong zigbee mesh network. I’m also using a newer Zigbee coordinator, and running Home Assistant on a mini PC instead of VMWare Workstation.
Considering these are the most-recommended door and window sensors recommended by others in the /r/HomeAssistant subreddit and the Home Assistant community forums as the best bang for your buck, I figured it couldn’t hurt to try them again.
I’m super happy I decided to give these a shot, as they are working perfectly in my new house!
Prerequisites
You will obviously need Home Assistant already setup and running, and have the ZHA (Zigbee Home Automation) added.
I also recommend that you have a few zigbee devices around your house already. With Aqara devices, I’ve been told it’s best to pair them from their final location. So, if this is your first device – then you may have a hard time pairing them. Or if you pair them close to your Zigbee coordinator, and then move them to the other side of the house, they may drop off the network occasionally.
Equipment
Here’s the hardware I’m using for this setup.
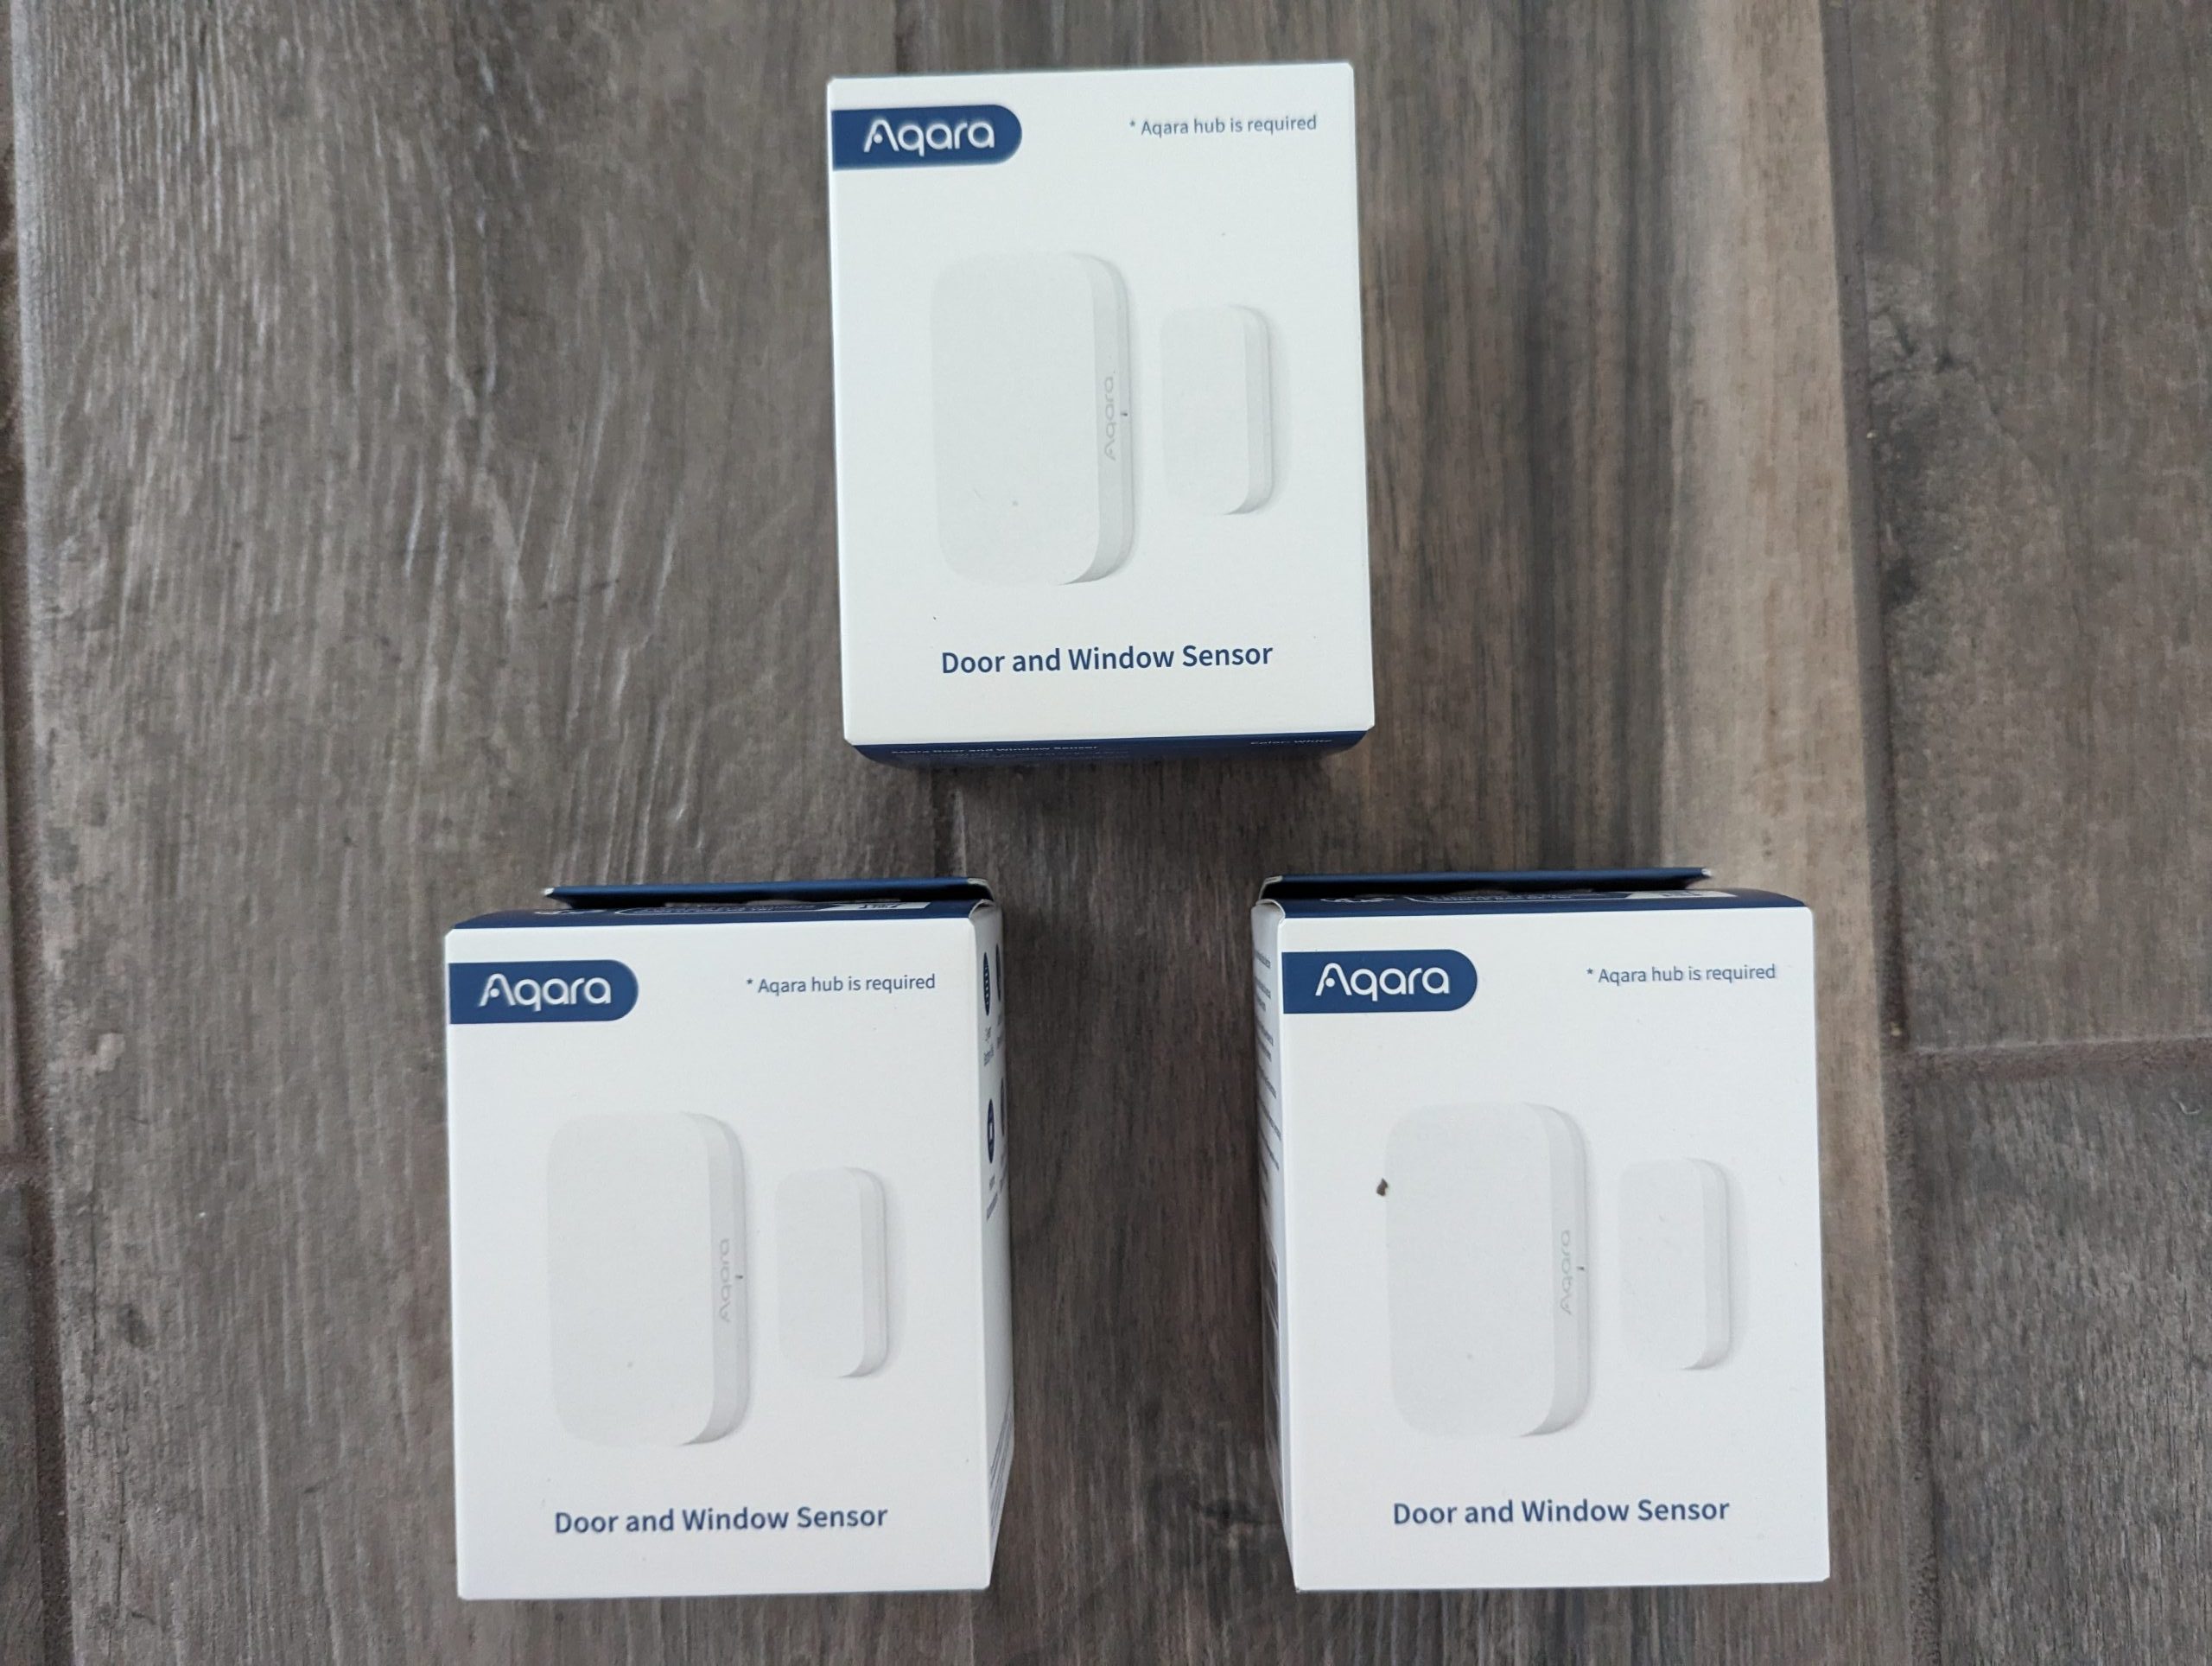
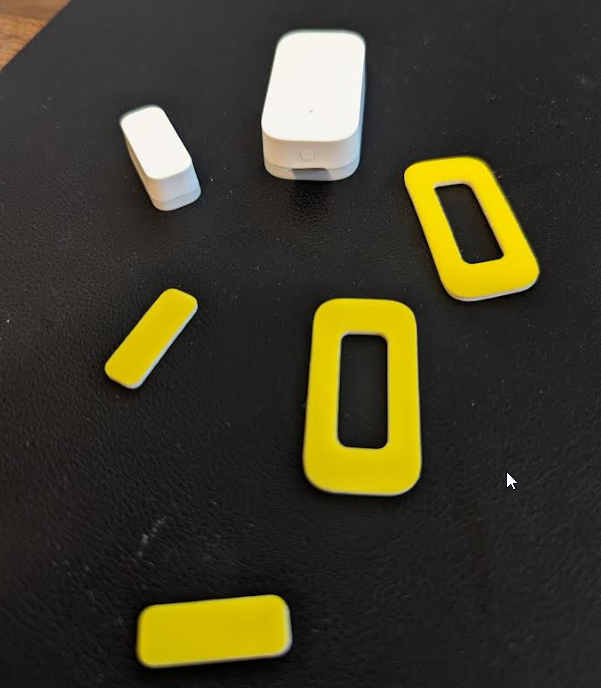
I bought the 3-pack of Aqara sensors, as it was cheaper to buy in bulk and Amazon included a 5% coupon when I purchased. Also, the Amazon listing states that you need an Aqara hub, but that is not the case. The “hub” you are using is your zigbee dongle.
Included in the box is the 2- parts of the contact sensor, and 2 sets of double-sided stickers.
Pairing to Home Assistant
The first step is to open Home Assistant and start the pairing process.
Settings > Devices & Services > Integrations > ZHA
Click on your devices, then click Add Device.

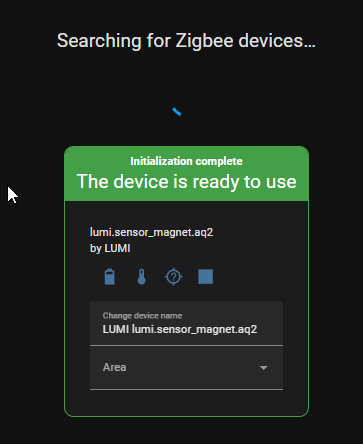
It will show a “Searching for Zigbee Devices” screen.
Then, walk over to the door or window you wish to install the sensor on.
Remove the pull tab, then press the button on the larger piece for about 5 seconds. It should flash blue indicating that the pairing has completed successfully!
Next, all you have to do is rename the device.
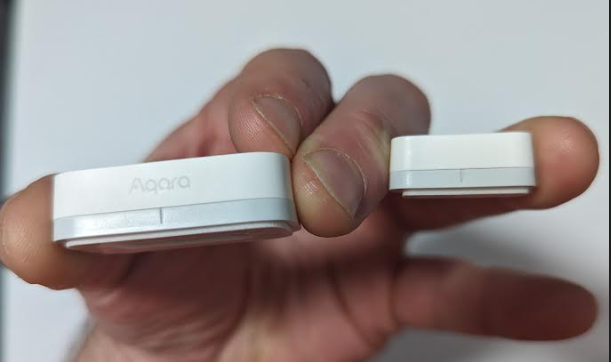
When installing them to the door, just make sure the small grooves are facing each other.
You can pull the two pieces apart 1-1.5″ before the status changes from closed to open.
Automation
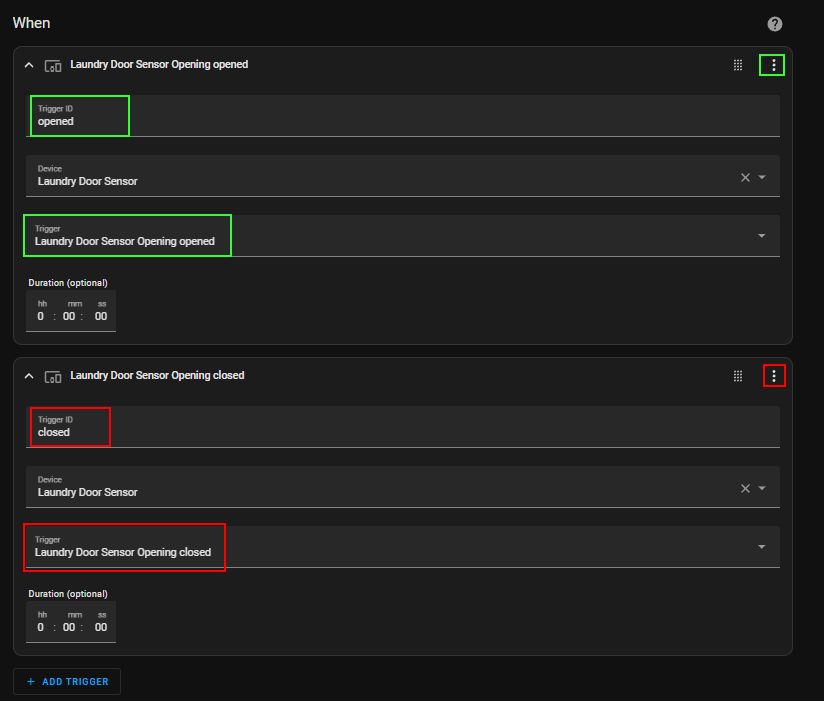
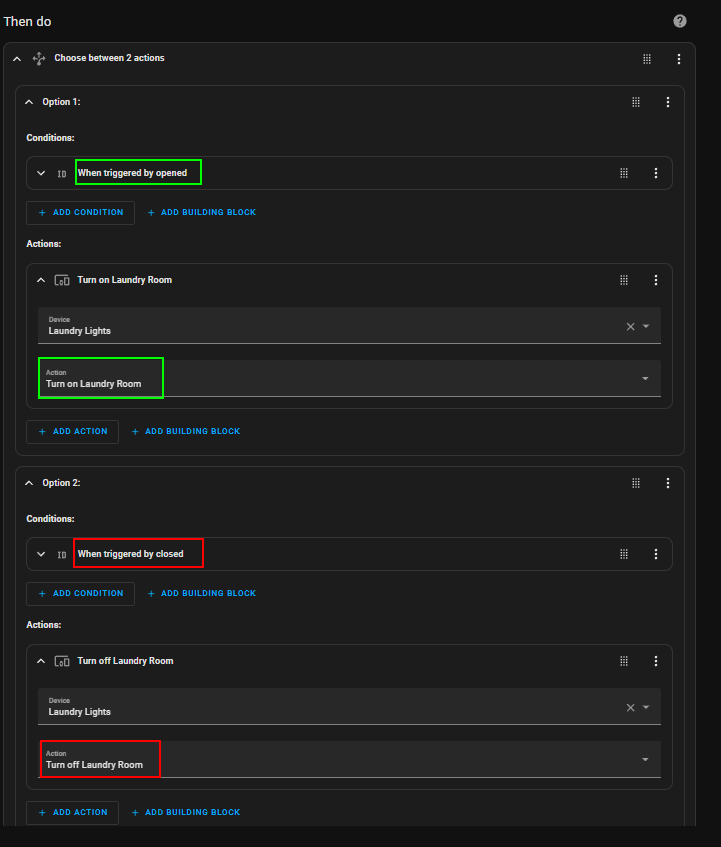
If you’d like to create an automation that automatically turns on the lights when the door is opened, and turns off the lights when the door is closed, then is how I set my automation up.
After adding the device to the “When” section, click the 3 dots and Edit ID.
For the Then Do section, select Choose.
Choose a trigger, and then set an action to either open or close depending on the trigger you selected. And then click Add Option to add a second.
Like this:
Wrapping up
I hope this guide helped you quickly and easily pair your Aqara door and window sensors to Home Assistant.