In this tutorial, I’m going to show you how to add Sonoff zigbee Wireless switch (model SNZB-01P) to Home Assistant in just a few quick steps! It’s called a switch, but really – it’s a smart button.
I bought a two-pack from Amazon for only $35.99, so that comes out to $18 per button. This button has 3 actions: single press, double-press, and long press or hold.
I’ve great success with the Aeotec SmartThings button, as well as the First Reality buttons, but I really liked how small these buttons are. I plan on using them to let my son turn his nightstand lamp on and off (his lamp is connected to a smart plug).
So, I thought I’d purchase a couple of these and see how well they pair to Home Assistant. After a few weeks of daily usage, I can highly recommend these.
Let’s get started!
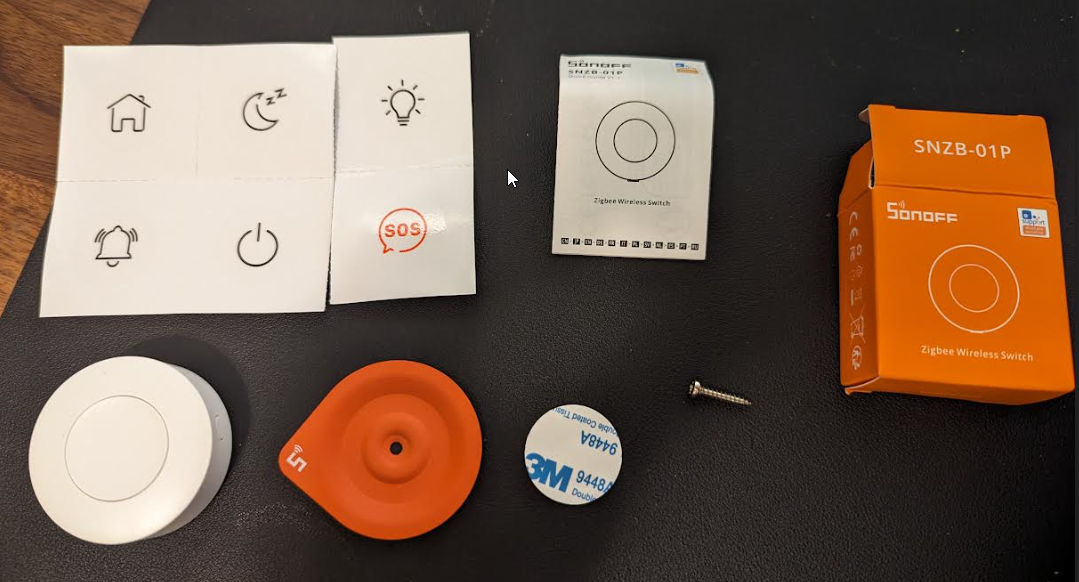
What’s in the box?
These Sonoff mini switches include:
- The smart button
- Instruction manual (which we don’t need)
- 6 stickers
- 1 adhesive sticker
- A metal mounting bracket
- A screw
This is one of the only smart buttons I’ve bought that actually include a metal mounting bracket, and stickers to label it, so that was a a surprising addition. I don’t think that I’ll actually need it, but it’s good to know that it’s included in case I ever need to install a button in an area that needs it.
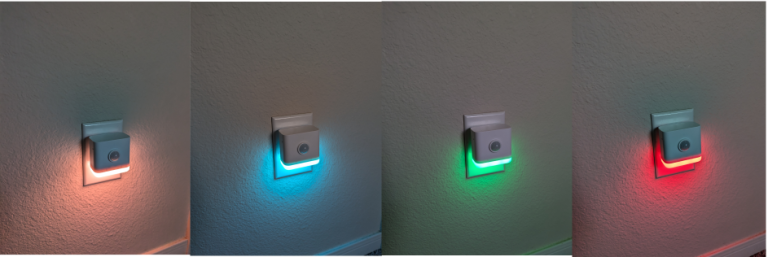
The button itself is also magnetic! So, if you want to place it over a screw on your switch cover, you definitely can.
Prerequisites
You will need Home Assistant running, Zigbee Home Automation (ZHA) installed, and a zigbee coordinator added to Home Assistant. I’m using a Sonoff
How To Pair Sonoff Zigbee Wireless Switch to Home Assistant
- Put ZHA into pairing mode by going to Settings > Devices and Services > Integrations > Zigbee Home Automation.
- Click you devices, then click Add Device.
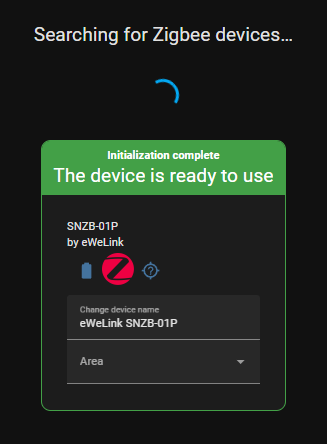
- Remove the pull tab. It immedietly starts blinking red, which means it’s in pairing mode.
- A few seconds later, it should be detected by ZHA.
- Rename the device.
Add Blueprint for Automations
Next, we need to configure the different button presses (single, double, or long press).
You could figure this out by going into your Developer Tools and “listening” for the triggered events of each – but an easier method is to simply import this blueprint.
- Click the link above.
- Click open link and make sure it points to the IP address of yuor Home Assistant server.
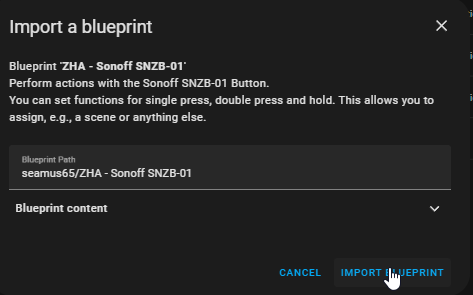
- On the “import a blueprint” popup in HA, click Preview, then Import Blueprint.
You show now see a new blueprint under your Blueprints tab. Click into that to create your automation.

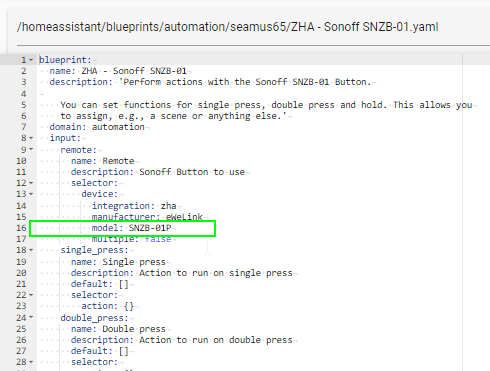
You will probably see a “no matching devices found” error. I did too. To fix that, we need to edit 1 line of YAML in the blueprint.
Open File Editor > blueprints folder > automation > seamus65 > ZHA-Sonoff SNZB-01.yaml
On line 16, change whatever value is there to SNZB-01P. The included blueprint had the wrong model number.
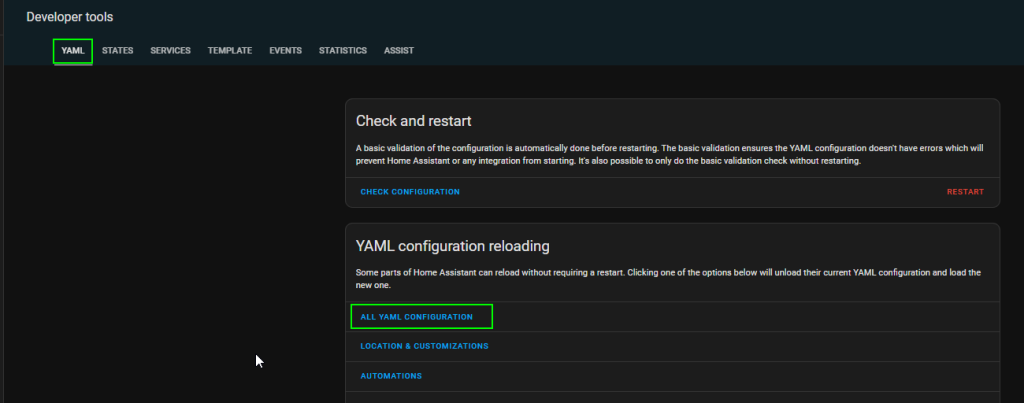
After that, we need reload the YAML from Developer Tools > All YAML Configuration.
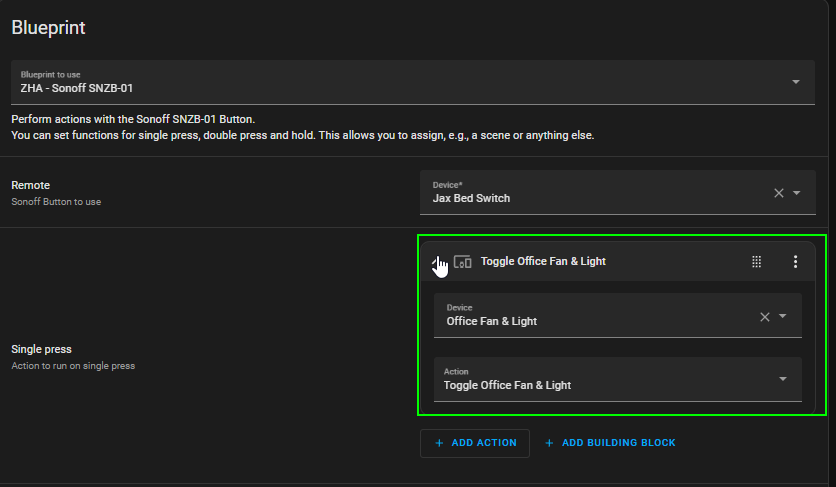
Now, if you try to use the blueprint – the correct button should show up! Now, it’s as simple as choosing an action for each press.
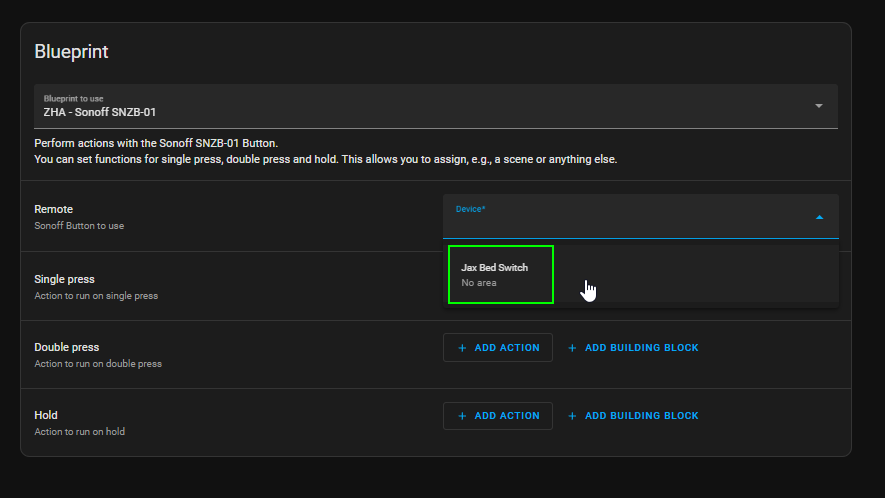
I’m having this button toggle a smart plug: